General
How to Replace the Cylinder on a Herman Miller Aeron Chair: A Step-by-Step Guide
Today, We will guide you through the process of replacing the cylinder on a Herman Miller Aeron Chair. Whether your chair has a top-activated or side-activated cylinder, this tutorial will cover both methods. Let’s dive right in!
Tools You’ll Need:
•Large Pipe Wrench
•Claw Hammer
•Hex Multi-Tool (T25 works best)
•Flathead Screwdriver
Step 1: Flip the Chair Over
To begin, place your Herman Miller Aeron chair upside down. This will give you better access to the cylinder and base.
Step 2: Remove the Cylinder (Top-Activated)
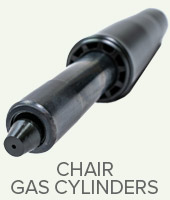
For a top-activated cylinder, grab your large pipe wrench and get a solid grip around the cylinder. It might take some muscle, so don’t be afraid to apply some force. Keep twisting the wrench while pulling up until the cylinder comes out.
Step 3: Detach the Cylinder from the Base
Once the cylinder and base are separated from the chair, you need to remove the cylinder from the five-star base. Turn the base upside down, and using a claw hammer, pound the cylinder out from the top of the base. Don’t worry if this requires some effort—it’s held in place by friction.
Step 4: Install the New Cylinder
Now, it’s time to install your new cylinder. Ensure the orientation is correct, then press it firmly into the chair. If you have a top-activated chair, you might need to adjust the set screw after placing the chair back on its feet.
Step 5: Adjust the Set Screw (Top-Activated Only)
If your chair’s cylinder isn’t activating properly, or if the chair sinks when you sit down, the set screw may need adjustment. To access the set screw, pop off the plastic cover on the chair. Using your hex multi-tool (T25), turn the screw counterclockwise in half-turn increments until the chair functions correctly.
Step 6: Reassemble the Chair (Side-Activated)
For side-activated chairs, the process is similar, but you’ll need to disconnect the cable from the cylinder before removal. After flipping the chair, remove the top plastic part to access the cable. Use a screwdriver to pop the plastic clip out, then remove the cable.
Once the old cylinder is out, place the new cylinder into the base and reattach the cable. Ensure the metal ball of the cable fits snugly into the cylinder connection, and snap the plastic clip into place. Reassemble the chair by pressing the base onto the cylinder and flipping the chair over.
Final Thoughts
And that’s it! You’ve successfully replaced the cylinder on your Herman Miller Aeron chair. If you have any questions or need further assistance, don’t hesitate to reach out to us at Crandall Office Furniture.
Watch the Full Video Tutorial
For a detailed walkthrough, be sure to watch our video tutorial linked below. If you found this guide helpful, please like and subscribe to our channel for more office furniture tips and tutorials.


